前言
在过完cifar-10的例程之后,现在对cifar-100的数据集进行训练,但是这一次不下载数据集的二进制版本,打算试用下caffe-python接口。现对此在 Windows Caffe 下的操作做简要记录!
cifar-100数据集获取
cifar-10数据集和cifar-100数据集的官方网址都是:https://www.cs.toronto.edu/~kriz/cifar.html
这个数据集就像CIFAR-10,除了它有100个类,每个类包含600个图像。,每类各有500个训练图像和100个测试图像。CIFAR-100中的100个类被分成20个超类。每个图像都带有一个“精细”标签(它所属的类)和一个“粗糙”标签(它所属的超类),比如超类“鱼”里边又细分为“水族馆的鱼,比目鱼,射线,鲨鱼,鳟鱼” 等小类。
cifar-100有三种版本,我下载的是第三个 CIFAR-100 python version
CIFAR-100 python version    161 MB  eb9058c3a382ffc7106e4002c42a8d85
CIFAR-100 Matlab version    175 MB  6a4bfa1dcd5c9453dda6bb54194911f4
CIFAR-100 binary version (suitable for C programs)  161 MB  03b5dce01913d631647c71ecec9e9cb8
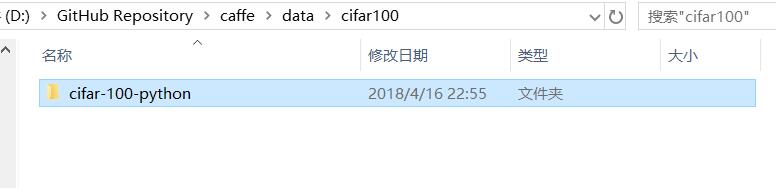
将下载好的压缩包压缩到路径 D:\GitHub Repository\caffe\data\cifar100。
在官网上注明了以下一小段代码:
def unpickle(file):
    import cPickle
    fo = open(file, 'rb')
    dict = cPickle.load(fo)
    fo.close()
    return dict
通过以上代码可以将其转换成一个dict对象,test和train的dict中包含以下元素:
-
data:一个n*3072的numpy数组,每一行都是(32,32,3)的RGB图像,n代表图像个数。 -
coarse_labels:一个范围在0-19的包含n个元素的列表,对应图像的大类别。 -
fine_labels:一个范围在0-99的包含n个元素的列表,对应图像的小类别。 -
而
meta的dict中只包含fine_label_names,第i个元素对应其真正的类别。
于是,在当前目录下新建 convert_dict.py 实现数据转换,内容如下:
# -*- coding: UTF-8 -*-
import os
import cPickle

import numpy as np
import sklearn
import sklearn.cross_validation
import sklearn.linear_model

import lmdb
import caffe


def unpickle(file):
    """ unpickle the data """
    fo = open(file, 'rb')
    dict = cPickle.load(fo)
    fo.close()
    return dict


def shuffle_data(data, labels):
    data, _, labels, _ = sklearn.cross_validation.train_test_split(
        data, labels, test_size=0.0, random_state=42
    )
    return data, labels


def load_data(train_file):
    """  load the train and test data"""
    d = unpickle(train_file)
    data = d['data']
    # coarse_labels = d['coarse_labels']
    fine_labels = d['fine_labels']
    length = len(d['fine_labels'])

    data, labels = shuffle_data(
        data,
        # np.array(zip(coarse_labels, fine_labels))
        np.array(fine_labels)
    )
    # coarse_labels, fine_labels = zip(*labels.tolist())
    return (
        data.reshape(length, 3, 32, 32),
        # np.array(coarse_labels),
        labels
    )


if __name__ == '__main__':
    cifar_python_directory = os.path.abspath("cifar-100-python")

    # meta=unpickle(os.path.join(cifar_python_directory, 'meta'))
    # fine_label_names=meta['fine_label_names']
    # print(fine_label_names)

    print("Converting...")
    cifar_caffe_directory = os.path.abspath("cifar100_train_lmdb")
    if not os.path.exists(cifar_caffe_directory):

        X, y_f = load_data(os.path.join(cifar_python_directory, 'train'))
        Xt, yt_f = load_data(os.path.join(cifar_python_directory, 'test'))

        print("Data is fully loaded,now truly convertung.")

        env = lmdb.open(cifar_caffe_directory, map_size=50000 * 1000 * 5)
        txn = env.begin(write=True)
        count = 0
        for i in range(X.shape[0]):
            datum = caffe.io.array_to_datum(X[i], y_f[i])
            str_id = '{:08}'.format(count)
            txn.put(str_id, datum.SerializeToString())

            count += 1
            if count % 1000 == 0:
                print('already handled with {} pictures'.format(count))
                txn.commit()
                txn = env.begin(write=True)

        txn.commit()
        env.close()

        env = lmdb.open('cifar100_test_lmdb', map_size=10000 * 1000 * 5)
        txn = env.begin(write=True)
        count = 0
        for i in range(Xt.shape[0]):
            datum = caffe.io.array_to_datum(Xt[i], yt_f[i])
            str_id = '{:08}'.format(count)
            txn.put(str_id, datum.SerializeToString())

            count += 1
            if count % 1000 == 0:
                print('already handled with {} pictures'.format(count))
                txn.commit()
                txn = env.begin(write=True)

        txn.commit()
        env.close()
    else:
        print("Conversion was already done. Did not convert twice.")
在当前目录命令行执行该文件:
python .\convert_dict.py
这个时候,糟心的事情发生了,出现报错,一个接一个,那好吧,一个个解决呗!!
-
报错
Non-ASCII character 'xe5' in file:Python默认是以ASCII作为编码方式的,如果在自己的Python源码中包含了中文(或者其他非英语系的语言),此时即使你把自己编写的Python源文件以UTF-8格式保存了,但实际上,这依然是不行的。解决办法很简单,只要在文件开头加入下面代码就行了。
# -*- coding: UTF-8 -*- -
提示找不到
ImportError: No module named 'cPickle'Traceback (most recent call last): File ".\convert_dict.py", line 2, in <module> import cPickle ImportError: No module named 'cPickle'python3版本没有cPickle了,改成
import pickle即可。 -
报错提示找不到模块
sklearn:ImportError: No module named sklearn使用anaconda在指定的python环境下安装包
scikit-learn。 -
报错提示找不到模块
lmdb:ImportError: No module named lmdb使用anaconda在指定的python环境下安装包
python-lmdb。 -
报错
UnicodeDecodeError: 'ascii' codec can't decode byte 0xff in position 0: ordinal not in range(128):Traceback (most recent call last): File ".\convert_dict.py", line 60, in <module> X, y_f = load_data(os.path.join(cifar_python_directory, 'train')) File ".\convert_dict.py", line 30, in load_data d = unpickle(train_file) File ".\convert_dict.py", line 16, in unpickle dict = cPickle.load(fo) UnicodeDecodeError: 'ascii' codec can't decode byte 0xff in position 0: ordinal not in range(128)修改语句
dict = cPickle.load(fo)改成dict = cPickle.load(fo, encoding='latin1') -
出现
RuntimeError: module compiled against API version 0xc but this version of numpy is 0xb报错:RuntimeError: module compiled against API version 0xc but this version of numpy is 0xb Traceback (most recent call last): File ".\convert_dict.py", line 10, in <module> import caffe File "D:\GitHub Repository\caffe-windows\python\caffe\__init__.py", line 1, in <module> from .pycaffe import Net, SGDSolver, NesterovSolver, AdaGradSolver, RMSPropSolver, AdaDeltaSolver, AdamSolver, NCCL, Timer File "D:\GitHub Repository\caffe-windows\python\caffe\pycaffe.py", line 13, in <module> from ._caffe import Net, SGDSolver, NesterovSolver, AdaGradSolver, \ ImportError: numpy.core.multiarray failed to import解决方案是,
numpy的版本太低,将numpy的版本更新到最新版。 -
找不到答案的报错:
 Traceback (most recent call last):
   File ".\convert_dict.py", line 69, in <module>
     datum = caffe.io.array_to_datum(X[i], y_f[i])
   File "D:\GitHub Repository\caffe\python\caffe\io.py", line 80, in array_to_datum
     datum.label = label
   File "C:\ProgramData\Anaconda3\envs\Caffe_3_5\lib\site-packages\google\protobuf\internal\python_message.py", line 674, in field_setter
     new_value = type_checker.CheckValue(new_value)
   File "C:\ProgramData\Anaconda3\envs\Caffe_3_5\lib\site-packages\google\protobuf\internal\type_checkers.py", line 132, in CheckValue
     raise TypeError(message)
 TypeError: 63 has type <class 'numpy.int32'>, but expected one of: (<class 'int'>,)
这是一个糟心的报错,没有解决方法,心灰意冷ing。
不想就此放弃,这个时候想到之前看过的一句话:“caffe在python3下的兼容性没有python2好”!!!!会不会是python3环境的问题。带着这个疑问和对caffe python的怨念。我打算重新编译一遍python2版本的caffe。说干就干!!!
整个过程和在python3下配置caffe的博客一样“Caffe for Windows10”。
- 为了不造成环境污染,我使用anaconda3新建虚拟环境
Caffe_2_7:conda create -n Caffe_2_7 python=2.7.14然后将新创建的虚拟环境添加到Path环境变量:
 C:\ProgramData\Anaconda3\envs\Caffe_2_7
 C:\ProgramData\Anaconda3\envs\Caffe_2_7\Scripts
因为我原来已经配置过python3的caffe版本,所以环境变量里边已经有python3的路径了,为了使用这个新增的python2,一定要将上述两条路径放到python3的路径的前边:

-
在构建cmake编译配置文件的时候依旧使用
cmake-gui工具,只需要在定义python版本的时候将python的数字修改为2。 -
为了能够成功运行python2版本的
import caffe:需要将新编译的caffe/python添加到环境变量PYTHONPATH,并保证新添加的路径在其他路径的前边。 -
其他操作完全一样。
-
同时为了避免找不到上述几个包的情况,我在新的虚拟环境里,使用conda重新安装了
ython-lmdb、scikit-learn包。这个时候重新在Windows PowerShell下执行python .\convert_dict.py: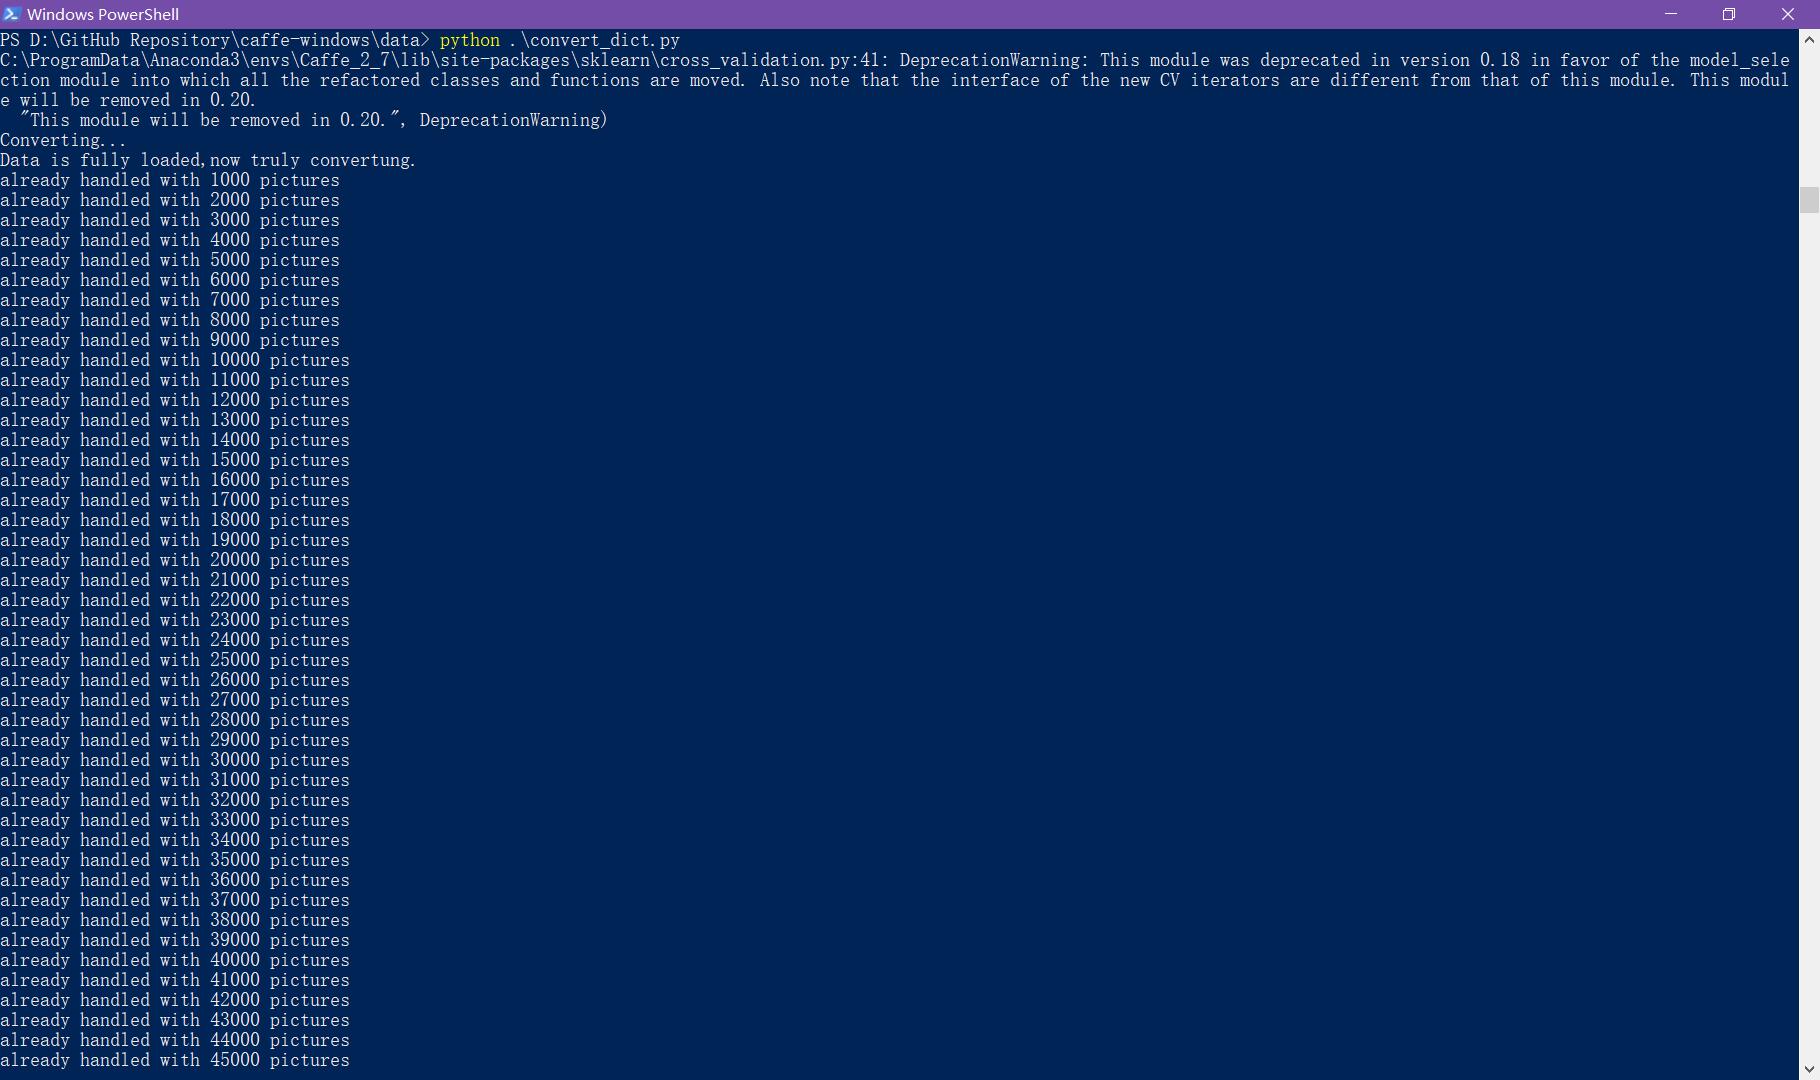
欢呼!!!!!!!!🙌
观察路径:
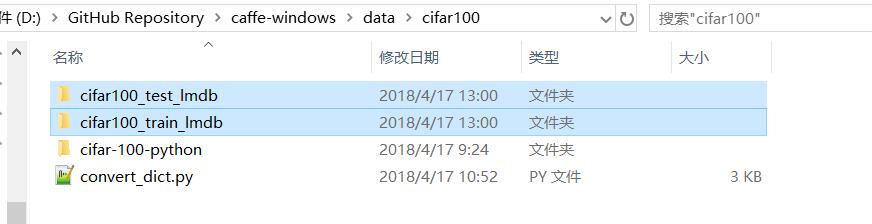
成功转换成我们熟悉的cifar100_train_lmdb和cifar100_test_lmdb了。
LMDB数据查看
我们将LMDB数据库中数据,将其转化为可视化的png格式,新建read_lmdb.py代码如下:
import lmdb
import os
import cv2
import cPickle
import caffe
from caffe.proto import caffe_pb2

def unpickle(file):
    """ unpickle the data """
    fo = open(file, 'rb')
    dict = cPickle.load(fo)
    fo.close()
    return dict

if __name__=='__main__':
    meta=unpickle(os.path.join('cifar-100-python', 'meta'))
    fine_label_names=meta['fine_label_names']

    env=lmdb.open('cifar100_train_lmdb')
    txn=env.begin()
    cursor=txn.cursor()
    datum=caffe_pb2.Datum()

    i=0
    for key,value in cursor:
        datum.ParseFromString(value)
        if i<10:
            data=caffe.io.datum_to_array(datum)
            label=datum.label
            img=data.transpose(1,2,0)
            cv2.imwrite('{}.png'.format(fine_label_names[label]),img)
        i+=1

    env.close()
    print('there are totally {} pictures'.format(i))
运行一下之后,当前目录下就会出现训练集中的前十张图片。
如果出现报错提示ImportError: No module named cv2,安装一下opencv包即可:
conda install -n Caffe_2_7 -c https://conda.binstar.org/menpo opencv
计算均值
对图像的数据预处理通常都是采取减去像素均值的方式,caffe-windows通过编译好的compute_image_mean.exe,我的在路径D:\GitHub Repository\caffe-windows\build\x64\install\bin下,具体的bat脚本可以参考cifar10-caffe-计算均值,这里给出python版本的,新建文件mean.py:
import caffe
import lmdb
import numpy as np
from caffe.proto import caffe_pb2
import time

lmdb_env=lmdb.open('cifar100_train_lmdb')
lmdb_txn=lmdb_env.begin()
lmdb_cursor=lmdb_txn.cursor()
datum=caffe_pb2.Datum()

N=0
mean = np.zeros((1, 3, 32, 32))
begintime = time.time()
for key,value in lmdb_cursor:
    datum.ParseFromString(value)
    data=caffe.io.datum_to_array(datum)
    image=data.transpose(1,2,0)
    mean[0,0] += image[:, :, 0]
    mean[0,1] += image[:, :, 1]
    mean[0,2] += image[:, :, 2]
    N+=1
    if N % 1000 == 0:
        elapsed = time.time() - begintime
        print("Processed {} images in {:.2f} seconds. "
              "{:.2f} images/second.".format(N, elapsed,
                                             N / elapsed))
mean[0]/=N
blob = caffe.io.array_to_blobproto(mean)
with open('mean.binaryproto', 'wb') as f:
    f.write(blob.SerializeToString())

lmdb_env.close()
运行文件在当前路径生成mean.binaryproto文件。
caffe网络结构文件的设置
仿照caffe里边关于cifar10的网络结构文件在cifar100文件夹里边新建cifar100_full_solver.prototxt:
# The train/test net protocol buffer definition
net: "examples/cifar100/cifar100_full_train_test.prototxt"
# test_iter specifies how many forward passes the test should carry out.
# In the case of CIFAR100, we have test batch size 100 and 500 test iterations,
# covering the full 50,000 testing images.
test_iter: 100
# Carry out testing every 1000 training iterations.
test_interval: 1000
# The base learning rate, momentum and the weight decay of the network.
base_lr: 0.001
momentum: 0.9
weight_decay: 0.004
# The learning rate policy
lr_policy: "fixed"
# Display every 200 iterations
display: 200
# The maximum number of iterations
max_iter: 60000
# snapshot intermediate results
snapshot: 10000
snapshot_format: HDF5
snapshot_prefix: "examples/cifar100/cifar100_full"
# solver mode: CPU or GPU
solver_mode: GPU
同样在cifar100里边新建cifar100_full_train_test.prototxt:
name: "CIFAR100_full"
layer {
  name: "cifar"
  type: "Data"
  top: "data"
  top: "label"
  include {
    phase: TRAIN
  }
  transform_param {
    mean_file: "data/cifar100/mean.binaryproto"
  }
  data_param {
    source: "data/cifar100/cifar100_train_lmdb"
    batch_size: 100
    backend: LMDB
  }
}
layer {
  name: "cifar"
  type: "Data"
  top: "data"
  top: "label"
  include {
    phase: TEST
  }
  transform_param {
    mean_file: "data/cifar100/mean.binaryproto"
  }
  data_param {
    source: "data/cifar100/cifar100_test_lmdb"
    batch_size: 100
    backend: LMDB
  }
}
layer {
  name: "conv1"
  type: "Convolution"
  bottom: "data"
  top: "conv1"
  param {
    lr_mult: 1
  }
  param {
    lr_mult: 2
  }
  convolution_param {
    num_output: 32
    pad: 2
    kernel_size: 5
    stride: 1
    weight_filler {
      type: "gaussian"
      std: 0.0001
    }
    bias_filler {
      type: "constant"
    }
  }
}

以下内容和caffe/examples/cifar10里边的`cifar10_quick_train_test.prototxt`雷同,不表!
开始训练 cifar-100
来到 Caffe 的根目录新建文件: run-train-cifar100.bat,双击运行,开始训练数据:
.\build\x64\install\bin\caffe.exe train --solver=examples/cifar100/cifar100_full_solver.prototxt
pause
结束后,在caffe\examples\cifar100 生成的caffemodel是训练完毕得到的模型参数文件,solverstate是训练中断以后,可以用此文件从中断地方继续训练。
新建文件:run-test-cifar100.bat 双击运行测试网络的效果和质量:
build\x64\install\bin\caffe.exe test -model=examples\cifar100\cifar100_full_train_test.prototxt -weights=examples\cifar100\cifar100_full_iter_xxxx.caffemodel.h5
pause
上边脚本的cifar100_quick_iter_xxxx.caffemodel(.h5)里边的xxxx根据你自己电脑生成的来写,比如我的是cifar100_full_iter_20000.caffemodel.h5。
要注意根据solver.prototxt的snapshot_format设置不同,存在生成的权值文件名不同的情况,有些是xxx.caffemodel有些是xxx.caffemodel.h5。
结束!!
本作品采用知识共享署名-相同方式共享 4.0 国际许可协议进行许可。欢迎转载,并请注明来自:黄钢的博客 ,同时保持文章内容的完整和以上声明信息!